[review] Philips Avance Noodle Maker (HR2365/05) - 飞利浦爱面机
 |
| Philips Avance Noodle Maker - HR2365/05 |
Here is a short clip of the Philips Avance Noodle Maker retailing at SG$329 that comes with a power of 200W and capacity size of 500 grams. With its user-friendly touch screen digital control panel, everyone at home including young kids can help up with the noodle making process with just a few touch on the buttons.
 |
| [Philips Avance Noodle Maker] Control Panel and Mixing Chamber |
- Power on/off button
- Extra extrusion button
- Bounciness control button
- Start/pause button
To begin the noodle making process:
1. Measure the flour and liquid for making either 1 (250g) or 2 (500g) portion of the noodles.
2. Press the power on/off button to switch on the noodle maker.
3. Remove the chamber lid and pour the flour into the chamber then close the lid properly.
4. The default kneading time on display is 5 minutes but you can press the bounciness control button to set the kneading time from 5 - 8 minutes for different type of noodles or your personal preference.
5. Press start/pause button to start processing (the appliance will beep once and the kneading indicator starts flashing).
6. Slowly pour in the liquid along the entire length of the slot on the left side of the chamber lid.
7. When the program finished, the noodles will come out from the shaping disc on the front panel and you can use the flat cleaning tool cut the noodles into desired length.
Note:
- After the noodle making is completed if you notice any leftover dough inside the chamber, you can press the extra-extruding follow by start/pause button for extra extrusion.
 |
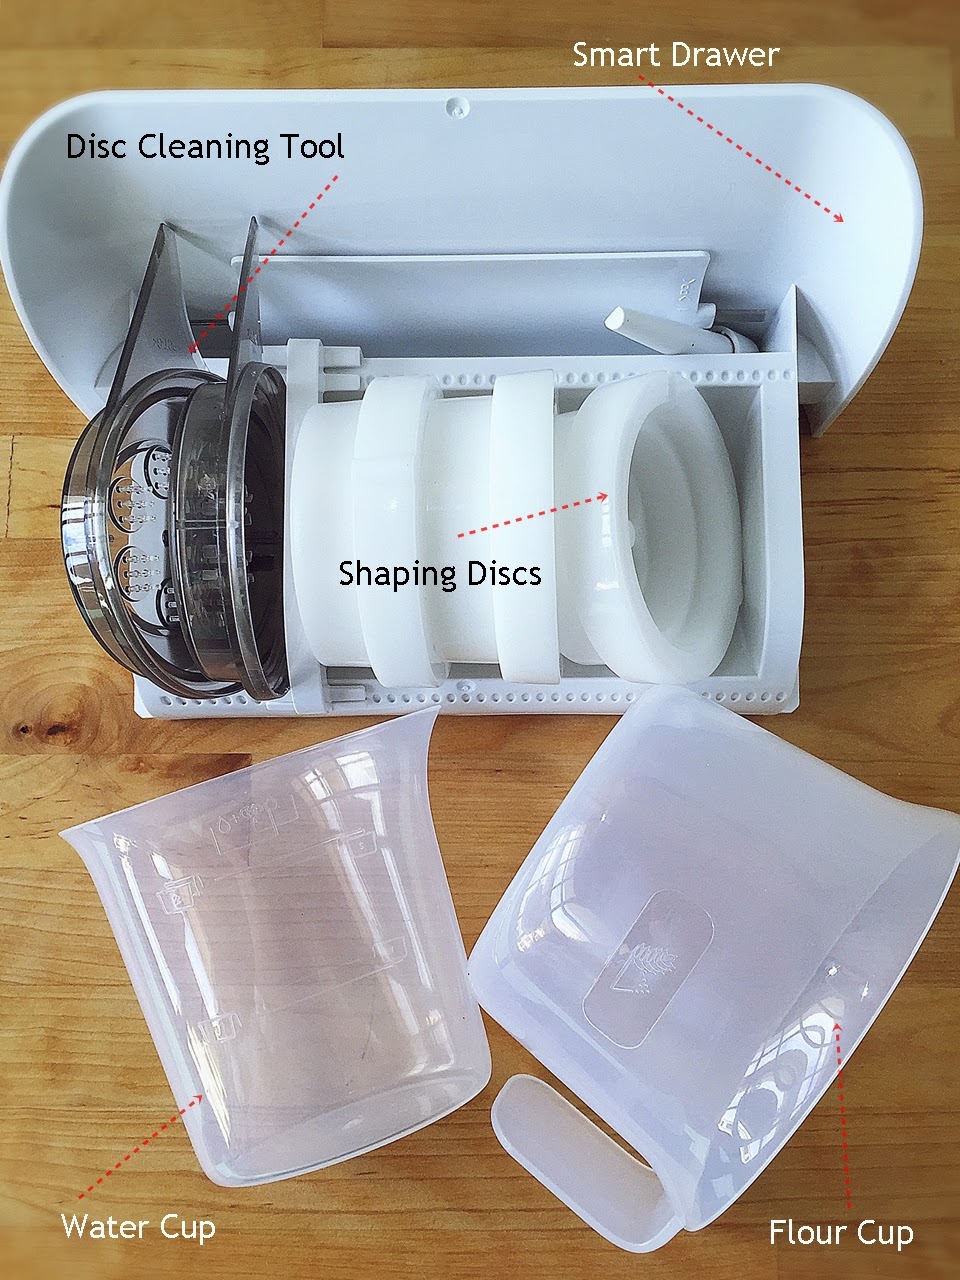
| [Philips Avance Noodle Maker] Storage drawer and cleaning tools |
 |
| [Philips Avance Noodle Maker] Shaping discs and cleaning tools. |
 |
| [Philips Avance Noodle Maker] Measuring Cups |
For liquid measurement, please take note there are two sides of measuring lines (for making 1 or 2 cups of flour) on the cup such as liquid (water/juice) or egg + liquid for making egg noodle. So make sure you use the correct side of the measurement when making your preferred noodles.
Above are some example of flours that you can use to make your choice of noodles from plain, wholemeal to buckwheat with the help of the noodle maker.
 |
| [Philips Avance Noodle Maker] Wholemeal Carrot Noodle |
 |
| [Philips Avance Noodle Maker] Disassembling the tools for cleaning |
To clean the noodle maker:
1. Press the power on/off button to turn off the noodle maker then and disconnect it from the power outlet.
2. Remove the chamber lid then loosen the front panel control knob to disassemble the front panel then follow by the shaping disc, shaping disc holder, mixing paddle and the mixing chamber in order.
3. Next use a dry cloth to clean flour residue in the hole, where the mixing paddle is placed.
*4. Clean the shaping disc with the supplied cleaning tool to remove dough residues stuck on it before cleaning it with water (refer to the cleaning process below).
- For better cleaning result, put the shaping disc into freezer for 2 hours or above, then use the cleaning tool to poke the dough in the holes out.
5. Clean and dry all detachable parts before assemble them back to the appliance.
 |
| [Philips Avance Noodle Maker] Cleaning the Spaghetti / Yellow Noodle shaping disc |
 |
| [Philips Avance Noodle Maker] Cleaning the Angel Hair / Mee Kia shaping disc |
 |
| [Philips Avance Noodle Maker] Assembling the noodle maker |
To assemble:
1. Push the mixing chamber into the appliance.
2. Position the mixing paddle to the hole in the main unit.
3. Attach the disc holder onto the front part (in line with the disc holder safety switch) of the appliance
4. Put the shaping disc onto the disc holder making sure it is firmly fixed.
5. Attach the front panel to the main unit and make sure the front panel knobs is fastened tightly.
6. Close the chamber lid properly.
Freshly made noodles can be store in the fridge for a few days (although eating them fresh will be great) by packing them separately for easy cooking on individual portion. But just take note to dust freshly made noodle with some flour to prevent strands from sticking when *storing in the fridge. Alternately dry noodles by hanging on noodle rack or stick in a dry place before storing.
* Note: Use air-tight container (instead of ziplock bag) to store packed noodles before putting them into the fridge.
Depending on individual preference and type of noodles; below is a guideline of the cooking time for noodles made using the Noodle Marker.
- Thin noodles (angel hair) require about 4 - 5 minutes cooking time.
- Thick noodles (spaghetti, fettuccine, udon) requires 6 - 8 minutes cooking time.
RECIPES USING PHILIPS AVANCE NOODLE MAKER
Besides the 20 tasty noodles/paste recipes included with the noodle makers there are still many interesting recipes which you can explore with this new appliance. Above is a quick demo on how to make spinach noodle (with angel hair / mee kia shaping disc) for my spinach wanton mee using Philips Avance Noodle Maker.
I also made a few other flavoured noodles like; [from left] Wholemeal Carrot Spaghetti, Lemon Scent Egg Noodle, Beetroot Carrot Fettuccine, Lemon Beetroot Penne and Spinach Angel Hair/Mee Kia to test out some recipes. (All coloured noodles are made using natural vegetables juice and no artificial colouring added)
Upcoming recipes
Overall this appliance is a good investment if your family loves noodle/paste dish because it definitely helps to save time when compared to the traditional way of making noodles. Furthermore you are assure that with homemade noodles, all ingredients used are natural and healthy without any preservative plus you can add in your creativity to customize your own flavoured noodles like beetroot carrot fettuccine, asparagus spaghetti and etc.
*Disclosure: I was given a set of the new Philips Avance Noodle Maker from Philips Singapore for this review purpose but all opinions expressed in this post are of my own and there is no monetary compensation received.


Hi Ellena,
ReplyDeleteI've just got myself a Philips Noodle Maker. I tried the recipe inside but the dough did not finish extruding all of it. Any idea what happen? I did tried out the extruding button a few times but not successful.
Thank you for a wonderful write up on the Philips noodle maker! Your post inspired me to buy this!!
ReplyDeleteSusan